This document contains the deep-dive build guides, complete parts lists, and risk mitigation strategies for all four major cooling modifications. As your MSI Crosshair 15 (i9-12900H, RTX 3070 Ti) is being used as a desktop replacement, these guides assume you are comfortable permanently altering the chassis.
#Part 0: System Baseline (Ubuntu, 2026-09-06)
Before any mod, these are the numbers this specific machine produced under light desktop load (a browser and a DisplayLink dock, load average 0.8). Everything below was read from the running Ubuntu system, not from Windows tools.
##The Machine
| Item | Value |
|---|---|
| Model | MSI Crosshair 15 B12UGSZ (Micro-Star International) |
| CPU / GPU | 12th Gen Intel Core i9-12900H (6P + 8E, 20 threads) / NVIDIA GeForce RTX 3070 Ti Laptop |
| Memory / Disk | 64 GiB / 3.1 TB (two NVMe drives) |
| Firmware | BIOS E1583IMS.112, EC firmware 1583EMS1.111 (2024-08-07) |
| OS | Ubuntu 24.04.4 LTS, kernel 7.0.0-31-generic, GNOME 46 on X11 |
| Drivers loaded | msi_ec, msi_wmi_platform (fan RPM), coretemp, nvidia 595.84, thermald active |
##Live Thermal Snapshot
| Metric | Reading | Comment |
|---|---|---|
| CPU package temperature | 96 °C (CRIT alarm) | At near-idle. Package hit 90 °C again seconds after dropping to 70 °C. |
| Hottest vs coolest core | Core 4 = 96 °C, Core 8 = 67 °C | 29 °C spread. A healthy mount shows under 10 to 15 °C. |
| Fans | 6857 / 6233 RPM | cooler_boost=on, fan_mode=auto. The fans are already at maximum. |
| MSI shift mode | unknown (192) | msi-ec cannot map the current EC mode on this firmware. Modes offered: eco, comfort, turbo. |
| CPU power limits (RAPL) | PL1 = 30 W, PL2 = 45 W | Intel spec for the 12900H is 45 W / 115 W. The EC is already power-throttling hard. |
| CPU governor | powersave (intel_pstate), 4.9 GHz max | Actual clocks during the snapshot: 1.8 to 2.6 GHz. |
| Package throttle counter | 3,231,620 and rising ~6 per second | The CPU is being throttled continuously, even at idle. |
| GPU | 45 °C at 25 W idle, 795 MHz | Power limit 115 W default, 140 W max reported by the driver. |
| NVMe / Wi-Fi | 44 to 47 °C / 53 °C | Fine. |
##What The Numbers Say
- The thermal interface has failed or the heatsink is not seated evenly. Ninety-six degrees at idle with both fans at full speed and a 29 °C gap between cores on the same die is the signature of pumped-out or dried factory paste, or a heatsink that only touches part of the die. More airflow (Mod 1) cannot fix this. Do Mod 4 (or at minimum Mod 0 step 1, the dust clean) before anything else.
- The 30 W / 45 W power limits are a symptom, not a setting. No MSI performance mode on this platform is that low: Notebookcheck measured a 121 W PL2 on the sister Crosshair 15 R6E in every mode [S1]. The EC has clamped power in response to its own thermal telemetry. Raising the limits in software before fixing the cooling will only push temperatures higher; raise them after Mod 4 (Part 5b) and expect the EC to keep re-asserting them until the sensors calm down.
- Check for bi-directional PROCHOT. MSI firmware can throttle the CPU because the GPU or VRM sensor is hot, even when the CPU die is not [S6][S18]. The throttle counter climbing at idle with a 45 °C GPU makes a CPU-side cause more likely here, but the combined soak in Part 6b is what settles it.
- The GPU is fine right now because it is idle. Its 115 W limit and the shared heatpipes mean it will push the CPU hotter under gaming load, so validate both together (Part 6b).
- Re-capture after every change with
tools/thermal_baseline.sh 2 <label>(Part 6b) so every mod has a before and after CSV.
#Mod 0: The Zero-Hardware Software Path
Everything here is free, reversible and done from a terminal on Ubuntu. Do it in this order, re-logging with thermal_baseline.sh after each step, and stop as soon as the idle package temperature is sane. If step 1 alone drops idle by 10 °C or more, the problem was dust and Mod 4 can wait.
##Options
- Option A: Dust clean (do this first, $0): Bottom cover off, compressed air out through the fin stacks from the inside, fans held still with a finger. Generic guides put dust alone at 10 to 15 °C on a 2 to 4 year old gaming laptop; combined with a repaste 20 to 30 °C [S27]. Low-medium confidence on the numbers, high confidence it costs nothing.
- Option B: Set the EC modes from Linux: This box runs the out-of-tree msi-ec DKMS driver, version 0.13 [L1]. Its config for firmware 1583EMS1 knows three shift modes (eco, comfort, turbo) and three fan modes (auto, silent, advanced); there is no custom fan-curve attribute in any msi-ec version [L3]. The
unknown (192)reading is EC value 0xC0, which is "sport" in the driver's other config tables but missing from this model's table, so the EC is most likely in its default sport mode and the driver simply cannot name it (medium confidence, read from the driver source).
  cat /sys/devices/platform/msi-ec/available_shift_modes      # eco comfort turbo
  echo turbo   | sudo tee /sys/devices/platform/msi-ec/shift_mode    # after Mod 4; use comfort until then
  echo silent  | sudo tee /sys/devices/platform/msi-ec/fan_mode      # auto | silent | advanced
  echo off     | sudo tee /sys/devices/platform/msi-ec/cooler_boost  # it is stuck on right now
Revert: write the previous value back. msi_wmi_platform (in-tree, gives the fan RPM) shares the same EC memory [L7]; leave it loaded for the RPM readings, but do not run two tools that write the EC at once.
- Option C: Cap the CPU power and calm the governor: Alder Lake-H keeps most of its multi-core performance up to about 65 to 75 W; above that the extra watts are mostly heat [S7]. This machine is already at 30 / 45 W by the EC's choice, so today the useful move is the opposite: stop the sawtooth, not cut further. EPP is already
performancehere, which fights the powersave governor; set it to balanced until the mount is fixed.
  echo balance_performance | sudo tee /sys/devices/system/cpu/cpu*/cpufreq/energy_performance_preference
  echo 1 | sudo tee /sys/devices/system/cpu/intel_pstate/no_turbo      # kill turbo spikes; revert with 0
  sudo cpupower frequency-set -u 3.0GHz                                # or cap the ceiling; revert with -u 4.9GHz
[L39] [L35]
- Option D: Frame-rate cap in games: CPU and GPU power scale with rendered frames; one Overclock.net report saw roughly 50 W less CPU package power from a cap in a CPU-bound title [S29]. Set it per game or install MangoHud (
fps_limit=); it is not installed here yet. - Option E: Drive the desktop from the Intel iGPU: Right now Xorg lists NVIDIA-0 as the source output, so the 3070 Ti draws the desktop and idles at 25 W. Switching to PRIME render offload (iGPU primary, NVIDIA as an offload GPU, runtime D3 already enabled on this driver) removes that heat and the GPU's share of the heatpipes [L26] [L27]. This is a display-stack change: on MSI it usually also means picking hybrid mode in the BIOS. It does not touch the CPU idle problem, so it is last on the list.
- Option F: Pin the browser to E-cores:
taskset -c 12-19 bravekeeps a chatty browser off the P-cores that are hitting 96 °C. Anecdotal benefit, zero risk.
##What not to expect
- CPU voltage undervolting does not exist on this CPU. Non-HX 12th-gen mobile parts ship with the voltage-offset MSR locked; Notebookcheck's summary is that Intel and the OEMs killed it [S3] [L33]. The hidden-BIOS unlock in Part 5 is unverified on BIOS E1583IMS.112 and may show the toggles without them working.
- Cooling pads do not fix idle temperatures. Every pad and vacuum-cooler result found is a load-temperature result [H9]. If idle is 96 °C, no fan under the laptop changes that.
#Mod 1: The "Forced Induction" Blower Pad & Chassis Cut
This modification leverages an industrial-grade sealed centrifugal blower to force massive amounts of air through your laptop, overriding the laptop's weak internal fans. We will maximize this by cutting away the restrictive plastic intake grills.
##Options
- Option A: The Extreme Pressure Setup (IETS GT600 / Llano V3): The most powerful, most expensive (~$100), and loudest option. Uses a magnetic memory foam seal to guarantee 100% static pressure. Best performance.
- Option B: The Mid-Tier Setup (IETS GT300 / KLIM Ultimate): Cheaper (~$50-$70) and slightly quieter, but uses weaker blowers. Good if you want to avoid ear-piercing noise but still want a massive upgrade over stock fans.
- Option C: DIY Noctua Shroud: 3D-printing a custom base that seals to your laptop and holds two 120mm Noctua industrialPPC fans. Requires CAD skills but offers the best noise-to-performance ratio.
##More Options (2026 research)
- Option D: Side-exhaust vacuum cooler (IETS GT202UB class, $25 to $40): Clips over the rear exhaust and pulls air through the laptop. Independent-ish sources put it at 8 to 15 °C on load temps, usually ahead of under-blowing pads, but only if its pull direction matches the laptop's own exhaust; if it fights the internal fans it does nothing [H10][H11]. Fully reversible, no disassembly.
- Option E: A plain stand, or nothing but elevation ($0 to $20): Jarrod'sTech's multi-laptop pad test (via secondary summaries) found a bare stand gave 4 to 10 °C on some laptops, matching cheaper pads [H9]. Try this before buying anything; it isolates how much of the problem is the desk blocking the intake.
- Option F: Open bottom with a mesh filter ($10): Run without the bottom cover, with a magnetic mesh filter over the exposed intakes. Zero restriction, but every bump risks the fans and the exposed board. Only for a machine that never leaves the desk.
- Option G: DIY blower from a server fan: A Delta or Nidec 97 mm blower in a 3D-printed duct. No sourced results exist for this on laptops; it is a project, not a purchase. Unverified.
Reality check on vendor claims. The only disclosed-methodology test found is Notebookcheck's: a generic top-selling pad on an MSI GP65 dropped the CPU 12 °C (92 to 80 °C) and the GPU 6 °C, at the cost of 5 dBA more noise [H9]. Sealed-pad vendor claims of 15 to 20 °C look inflated against that; plan on about 10 °C from Option A and 5 °C from Option B [H1][H5][H7]. Two corrections to the shopping list: no "IETS GT700" exists as a listed product, and "Tryone" coolers could not be verified at all, so neither is in the parts list. None of this moves an idle temperature; airflow options only help after Mod 4 fixes the mount.
##Parts List (For Option A)
- High-Pressure Cooling Pad: IETS GT600 (V1 or V2) or Llano V3.
- Rotary Tool: Dremel with a plastic-cutting wheel or fine sanding drum.
- Filing tools / Sandpaper: To smooth the cut edges.
##Build Guide
- Disassembly: Unplug the laptop, remove all bottom screws, and carefully pry off the bottom plastic chassis cover. Do not cut the chassis while it is attached to the motherboard.
- Marking the Cuts: Look at the bottom chassis cover. Identify the vent areas that sit directly over the two laptop fans. Mark a circle that exactly matches the circumference of the fans.
- Cutting: Using the Dremel, carefully cut away the plastic grill covering the fans. You are essentially creating two large, unobstructed holes directly above the fan intakes.
- Deburring: Sand the edges of your cuts so no plastic shavings can fall into the fans.
- Reassembly: Reattach the bottom chassis.
- Mating to the Blower: Place the laptop on the cooler. Adjust the foam blocks so they create a 100% airtight seal against the bottom of the laptop.
- Operation: The sealed foam means all air pushed by the blower must exhaust out of the laptop's side/rear vents. You can now lower the laptop's internal fan curve to reduce wear.
##Risk Mitigation
- Dust Accumulation: The blower pad will push more dust into your system. Both the IETS and Llano have washable dust filters on their intakes. Clean them weekly.
- Over-spinning Internal Fans: Blower pads push so much air they can manually spin your laptop fans faster than they are designed to go, wearing out their bearings. Set your laptop fans to a constant 50% speed in MSI Center to engage their motors and provide resistance.

#Mod 2: The "Frankenstein" Desktop Air Cooler Swap
This mod bypasses the laptop's heatsink entirely and uses standard PC tower coolers for massive thermal mass and silent fans.
##Options
- Option A: Low-Profile Downdraft Coolers (Noctua NH-L9i / ID-COOLING IS-30): The safest option. These are lighter, reducing the risk of cracking the die, and the fans blow down onto the motherboard, cooling the VRMs and VRAM naturally.
- Option B: Dual Tower Coolers (Thermalright Peerless Assassin 120): Extreme thermal mass. Allows passive or completely silent cooling. However, they are incredibly heavy and pose a severe risk of cracking the laptop die if bumped.
- Option C: Server 1U Copper Heatsinks: Using flat, heavy 1U server copper blocks with a high-RPM fan wall blowing across them. Easier to mount safely than towers, very industrial look.
##More Options (2026 research)
- Option D: A fresh stock heatsink assembly ($40 to $80): Before bolting anything exotic on, consider that a warped baseplate is one of the causes of the 29 °C core spread. Heatsink part E32-2500871-HH7 is listed as shared across Katana GF66, Sword 15, Pulse GL66, WF66, Creator M16 and Crosshair 15 [H30], so replacements are plentiful. Same cooling capacity as stock, but flat.
- Option E: AIO cold plate direct on the dies: Documented one-off builds exist (a desktop cooler bolted to a GTX 1060 laptop, the Overclockers.com cooler mod) [H43][H44]. Same zip-tie mounting risks as Options A and B, but the pump-block is lighter than a tower and the radiator can live off the board. Medium confidence that it works; single-builder evidence.
- Option F: Peltier / TEC on a heatsink: Not recommended. The TEC's hot side needs its own big cooler, and the cold side sits below dew point in any humid room; condensation on a laptop board is the documented failure mode [H45][H46]. Nobody found has run one inside a laptop for long.
- Heatsink lapping: Only desktop cases were found. Laptop baseplates are thin copper or vapor chamber sections and easier to ruin than a tower base; treat as unverified and high risk.
Dropped idea: the "donor heatsink from a bigger MSI". No community thread shows a Raider GE66 or Vector GP66 heatsink dropping into this chassis; GE66 is a different chassis, and the Pulse/Katana family shares the same cooler as the Crosshair, so there is no upgrade to borrow [H30][H32].
##Parts List (For Option A)
- Desktop Coolers: 2x low-profile coolers (e.g., Noctua NH-L9i).
- Thermal Interface: Honeywell PTM7950 phase-change pads.
- Mounting Hardware: Heavy-duty nylon zip ties, custom 3D printed brackets, and nylon washers.
- Fan Adapters: VGA/Laptop PWM fan to standard 4-pin PC fan adapter cables.
##Build Guide
- Teardown: Remove the bottom chassis permanently. Unplug the battery and remove the stock MSI heatsink.
- Prep the Dies: Clean the bare silicon of the 12900H and RTX 3070 Ti. Apply PTM7950 pads.
- Cooler Placement: Place the desktop heatsink cold-plates directly onto the dies.
- Mounting: Standard coolers do not fit laptop holes. Thread heavy-duty zip ties through the motherboard's heatsink screw holes, loop them through the desktop cooler brackets, and pull tight. Use nylon washers between the zip-tie head and motherboard to avoid scraping traces.
- Fan Wiring: Connect the desktop fans to the laptop's motherboard using the adapter cables.
- Invert the Setup: The laptop must now sit upside down, or be mounted vertically.
##Risk Mitigation
- Die Cracking (Critical Risk): Laptop CPUs/GPUs are "bare die". If you tighten the zip ties unevenly, the cooler will tilt and crack the silicon, destroying the laptop. Tighten in a cross-pattern, millimeter by millimeter.
- VRM/VRAM Cooling (If using Option B): Tower coolers do not blow air onto the motherboard. You must attach small adhesive copper heatsinks to the VRAM chips and VRMs, and aim a separate fan at them.
#Mod 3: External Water Cooling Loop
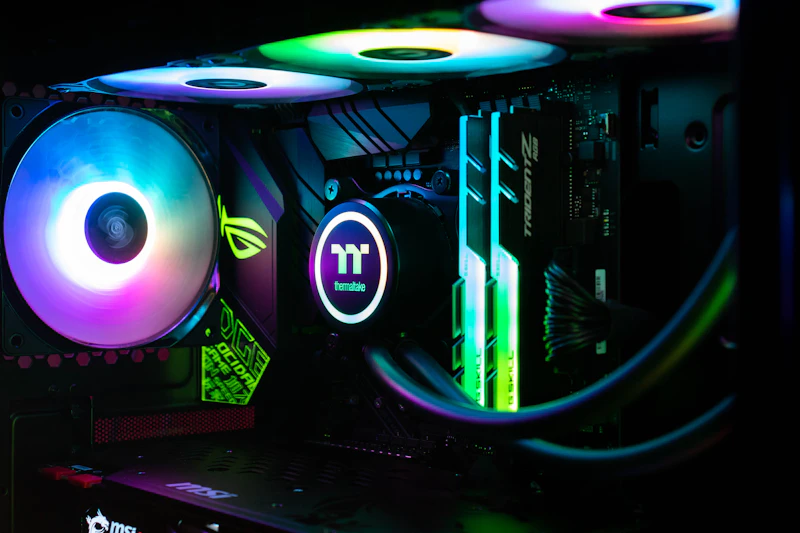
The ultimate cooling mod. We will attach a water-cooling loop directly to the laptop's existing vapor chamber or directly to the dies.
##Options
- Option A: The Copper Tube Mod: The most common. Flattened copper tubes are soldered or thermally glued to the top of your existing MSI laptop heatsink. You keep the laptop fans, but add a massive external water loop to assist.
- Option B: Direct-Die Universal Waterblocks: Removing the stock heatsink entirely and zip-tying small generic 40x40mm copper waterblocks directly to the CPU and GPU dies. Requires separate VRM cooling but offers better die temperatures than Option A.
- Option C: Custom Milled Coldplate: The ultimate, most expensive route. Designing a custom copper block in CAD that covers the CPU, GPU, VRAM, and VRMs perfectly, and having it CNC milled.
##More Options (2026 research)
- Option D: Clamp-on copper block over the existing heatpipes: A flat copper water block clamped (not glued or soldered) across the heatpipe run above the CPU. Forum builds report it works with paste between block and pipe, at lower efficiency than a bonded tube but with no risk of cooking the vapor chamber [H39]. Reversible.
- Option E: Quick-disconnect loop: Alphacool Eiszapfen G1/4 no-drip couplers let the laptop unplug from the radiator stand without draining. Still a desktop-parts build; no current commercial laptop water-cooling kit exists in 2024 to 2026 despite what AliExpress listings imply [dropped].
- Option F: Chiller or TEC sub-ambient loop: The dew-point control maths is real and used on desktop benches [H40][H41][H42], but no source runs it inside a laptop chassis. Keep coolant above room temperature; anything colder is unproven on a laptop and one humid day from a dead board.
##Parts List (For Option A)
- Mod Kit: Search AliExpress for "Laptop Water Cooling Copper Tube". Needs flat copper tubing (2mm-3mm thick).
- Thermal Adhesive: High-conductivity thermal glue (e.g., Fujikura) OR low-temperature solder paste.
- External Loop: 240mm/360mm PC Radiator, 12V Pump/Res combo, Quick-disconnect fittings, silicone tubing.
##Build Guide
- Chassis Modification: Dremel a slot in the bottom chassis where the water tubes will exit.
- Prepping the Heatsink: Identify the flattest area of the heatpipes above the CPU/GPU. Sand the black paint off until bare copper is exposed.
- Attaching the Tubes:
- Bend the flat copper tube to follow the heatsink and exit the chassis hole.
- Method A (Glue): Coat the sanded heatpipe with thermal epoxy, press the flat water tube onto it, and clamp tightly for 24 hours.
- Method B (Solder): Apply low-melt solder paste, clamp tubes, and use a heat gun to reflow. (Warning: high heat can boil and ruin the stock heatpipes. Glue is safer).
- Plumbing: Reinstall the heatsink. Attach soft tubing to the new copper tube. Route to your external pump/radiator.
- Filling: Fill the external reservoir with distilled water + biocide. Run the pump to bleed air.
##Risk Mitigation
- Solder vs Glue: Soldering provides better heat transfer but is extremely risky for the stock vapor chamber.
- Condensation: If your loop runs too cold compared to the room, condensation will form and short the motherboard. Keep water temp slightly above ambient.

#Mod 4: The Core Thermal Interface Overhaul
Regardless of the mod you choose, fixing the factory thermal interface is the mandatory foundation.
##Options
- Option A: Phase Change Material (Honeywell PTM7950): The highly recommended route. Melts at 45C to act like liquid, solidifies when cool. Zero pump-out effect, lasts years, no electrical shorting risk. Performs almost as well as liquid metal.
- Option B: Liquid Metal (Thermal Grizzly Conductonaut): Absolute best thermal transfer. Extremely dangerous. Requires applying conformal coating (nail polish for electronics) to the microscopic resistors around the CPU/GPU to prevent shorts, and creating foam dams to stop the metal from spilling out.
- Option C: High-End Traditional Paste (SYY-157 / Thermalright TF8): The easiest. Very thick pastes designed to resist "pump-out" on direct-die laptops. Requires repasting every 6-8 months as they dry out.
##More Options (2026 research)
- Option D: Thermal Grizzly KryoSheet graphene pad ($20 to $25): Correction to common advice: it is electrically conductive. Thermal Grizzly sells Kapton sheets specifically to insulate around it; treat it like liquid metal for shorting risk, minus the migration [H16][H18]. Head-to-head it trails PTM7950 by 2 to 3 °C, and one 14-week test saw it separate and form voids while PTM7950 stayed bonded [H19]. On a laptop that flexes, stay with Option A.
- Option E: Diagnose and fix mount pressure first: When the heatsink comes off, read the paste footprint. A thin, even squish means contact was fine and the paste simply failed; a thick patch on one side means the heatsink is not touching the whole die, which is what a 29 °C core spread looks like [H36]. Fix in this order: check the baseplate for warp (replace it, Mod 2 Option D); then a thin copper shim with paste both sides if the die sits low [H37][H38]; only then consider washers. Stacking washers unevenly is itself a documented cause of uneven pressure [H35], so add identical washers to every screw or none.
- Option F: PTM7958 and Heilos as PTM7950 substitutes: PTM7958 is the same Honeywell material under a customer part number (Framework sells it), also available as a paste, so buy whichever is cheaper [H14][H15]. Thermalright Heilos tested as a "medium quality" 0.2 mm pad in Igor'sLab's five-way roundup and may be a rebrand; it is a budget fallback, not an equal [H20][H21].
- Option G: Conductonaut Extreme instead of Conductonaut: Roughly 18 % higher conductivity on the spec sheet and a wider temperature range, but no laptop-specific measurement exists; treat it as a small increment on top of Option B's risks [H22][H23].
- VRAM and VRM putty, resolved: Upsiren U6 Pro (about 12.8 W/mK, non-conductive) is the easy one; UX Pro measures 1 to 2 °C better but is harder to work with [H25][H26]. K5 Pro could not be verified in this pass. Putty matters more on this chassis than most: the teardown snippet reports the sixth heatpipe that serves the VRM and VRAM is not tied into either fan's fin stack [H27], so those parts rely on contact quality alone.
Chassis-specific notes. Thickness matters: a 0.05 mm mismatch in the PTM7950 cut can cost 3 to 5 °C on a thin die [H13], so cut to the die outline, not larger. Use MSI's own MS-15P2 Crosshair (GL) service guide for the screw order [H34], after confirming its model code matches the B12UGSZ label under the battery. The LaptopMedia teardown reports two CPU heatpipes and three GPU heatpipes with two fans [H27][H28]; it could not be fetched in full, so verify against the machine when it is open.
##Parts List (For Option A)
- Thermal Interface: Honeywell PTM7950 Phase Change Thermal Pad (40x80mm sheet).
- Thermal Putty: Upsiren U6 Pro or K5 Pro (for VRAM/VRMs).
- Cleaning Supplies: 99% Isopropyl Alcohol, Q-tips.
##Build Guide
- Disassembly: Remove the bottom chassis and stock heatsink.
- Cleaning: Completely remove all factory grey thermal paste from the dies and factory thermal pads from the memory/VRMs. Clean until shiny.
- PTM7950 Application:
- Put the PTM7950 sheet in the freezer for 10 minutes.
- Cut a piece exactly to the size of the bare silicon CPU die and GPU die.
- Peel one side, stick to the die, and carefully peel the top plastic using tweezers.
- Thermal Putty Application: Apply small "balls" of Upsiren U6 Pro/K5 Pro onto every VRM and VRAM chip. Putty squishes perfectly, ensuring the heatsink sits 100% flat on the die with maximum pressure (unlike aftermarket thermal pads which are often too thick).
- Reassembly: Screw the heatsink back down in the numbered order.
#Alternatives to Modding
Not every fix is a mod. These are the routes that avoid cutting plastic, ranked by how much of the problem they actually address on this machine.
| Route | Cost | Fixes the 96 °C idle? | Verdict for this laptop |
|---|---|---|---|
| Dust clean + repaste by a shop | Roughly $50 to $150 labour (unverified 2026 pricing, confirm locally [S27]) plus $15 of PTM7950 if you supply it | Yes, if that is the cause | The sane default if you do not want to open it yourself. Insist on PTM7950 or a thick paste, not generic grey paste. |
| Warranty / RMA | Free if covered | Yes | A 2022 B12U unit is almost certainly outside MSI's standard two-year warranty in 2026 unless extended cover was bought [inferred, not sourced]. Worth one call before any chassis cut voids it for good. |
| External GPU | $300 to $600 | No | Not available. The Crosshair 15 has no Thunderbolt 4; its USB-C is 3.2 Gen 1 [S22][S23]. Only an OCuLink M.2 hack would work, and it does nothing for CPU heat anyway. |
| Desktop offload / thin client | Cost of the other machine | Sidesteps it | If the heavy work moves to a desktop or server and the laptop just displays it, the laptop runs cool by definition. Already the pattern for anyone with a GPU box on the LAN. |
| Replace the machine | $1,500+ | Yes | The honest comparison point for Mods 2 and 3: a $300 water loop on a 2022 laptop competes with a used 2024 laptop with a healthier cooler. |
| Live with a power cap | Free | Partly | Cap PL1 around 45 to 65 W and lock a frame rate. Most of the multi-core performance is captured by about 65 to 75 W on Alder Lake-H [S7]; above that, watts buy heat, not speed. Does not fix a bad mount, but stops the throttle sawtooth. |
When each beats the mods: the shop repaste beats Mod 4 only on time, not result. Replacement beats Mods 2 and 3 on cost once you count the tools and the risk of a cracked die. Nothing in this table beats Mod 1 for a desktop-replacement machine that is already repasted, because a sealed blower is cheap, reversible and needs no disassembly.
#Tiers and Decision Matrix
Every option in this guide, ordered by how much you have to commit. Expected gains are for sustained load on this chassis after a good mount; "idle fix" says whether the option addresses the 96 °C idle problem from Part 0. Costs are 2026 street prices, unverified for your region.
##The Ladder
| Tier | What it is | Cost | Reversible | Warranty | Expected gain |
|---|---|---|---|---|---|
| T0 Free | Mod 0: dust clean, msi-ec modes, power caps, frame cap, stand | $0 to $20 | Yes | Kept | 5 to 15 °C if dust is the cause; stops the throttle sawtooth [S3] |
| T1 Under $50 | Vacuum cooler or mid-tier pad (Mod 1 D/B); PTM7950 + putty repaste (Mod 4 A) | $25 to $50 | Yes | Voided only if a seal is broken | Repaste: typically 10 to 20 °C on a failed mount [H13]; pad: 5 to 12 °C load [H9] |
| T2 Under $150 | Sealed blower pad (Mod 1 A); fresh heatsink (Mod 2 D); liquid metal (Mod 4 B) | $60 to $150 | Mostly | Gone if the heatsink is replaced | Pad about 10 °C load; LM 1 to 5 °C over PTM7950 [H19] |
| T3 Chassis cut | Mod 1 with intake grills cut out | Pad + $30 tools | No | Gone | A few °C over T2, mainly lower fan noise |
| T4 Extreme | Mod 2 desktop cooler or Mod 3 water loop | $150 to $400 | No | Gone | 20 °C+ and near-silent, at real risk of a cracked die |
##Decision Matrix
| Option | Cost | Risk to hardware | Idle fix? | Load gain | Reversible | Works from Linux |
|---|---|---|---|---|---|---|
| Mod 0 dust clean | $0 | Low | Likely partial | 5 to 15 °C | Yes | n/a |
| Mod 0 power caps and EPP | $0 | None | No (masks it) | Stops throttling, costs speed | Yes | Yes, RAPL and msi-ec (Part 5b) |
| Mod 0 frame cap | $0 | None | No | Up to tens of watts less [S29] | Yes | Yes, per game or via MangoHud |
| Mod 1 A sealed pad | $80 to $110 | Low, dust | No | About 10 °C | Yes | n/a |
| Mod 1 D vacuum cooler | $25 to $40 | Low | No | 8 to 15 °C | Yes | n/a |
| Mod 1 chassis cut | Tools | Medium | No | Small extra | No | n/a |
| Mod 2 D fresh heatsink | $40 to $80 | Low | Yes, if warped | Restores stock | Yes | n/a |
| Mod 2 A/B/E desktop cooler | $60 to $150 | High, die crack | Yes | 20 °C+ | No | Fan control lost |
| Mod 3 A/D water on heatpipes | $150 to $300 | Medium to high | Yes | 15 to 25 °C | Partly (D) | External pump only |
| Mod 4 A PTM7950 + putty | $25 | Low | Yes | 10 to 20 °C | Yes | n/a |
| Mod 4 B liquid metal | $15 + coating | Medium, shorts | Yes | Best by 1 to 5 °C | Messy | n/a |
| Mod 4 D KryoSheet | $25 | Medium, conductive | Yes | 2 to 3 °C worse than A | Yes | n/a |
| Mod 4 E shim / pressure | $5 | Medium, over-torque | Yes | Fixes the spread | Yes | n/a |
| Shop repaste | $50 to $150 | Low | Yes | Same as Mod 4 A | Yes | n/a |
| Replace laptop | $1,500+ | None | Yes | Everything | n/a | Depends |
Recommended path for this machine: T0 dust clean and re-log; T1 repaste with a mount-pressure check (Mod 4 A + E) and re-log; then, because it lives on a desk, T1 vacuum cooler or T2 sealed pad; then Part 5b to lift the power limits and Part 6b to prove it. Only if the combined soak still throttles does T4 make sense.
#Part 5: Post-Mod Power Tuning & Software
Unlocking your thermals is only half the battle. You must adjust the software to pull more wattage.
##1. CPU Tuning (Undervolting & Unlocking)
- Unlocking the BIOS: Reboot. In the BIOS, hold
Right Ctrl + Right Shift + Left Altand pressF2. - Enable Overclocking: Go to
Advanced -> OverClocking Performance Menu. Enable OverClocking andXTU Interface. - Undervolting: Boot into Windows, download ThrottleStop. Apply a
-50mVto-70mVcore voltage offset. This allows the CPU to sustain its maximum turbo indefinitely.
##2. GPU Tuning (Overclocking & VBIOS Flashing)
- MSI Afterburner: Apply a
+150MHzCore Clock and+500MHzMemory Clock offset. The GPU will no longer downclock itself due to heat. - VBIOS Flashing (Extreme): If using water cooling (Mod 3) and temps are under 60°C, you can flash a higher-TGP VBIOS from a heavier MSI laptop (like the Raider GE76) using
nvflash. Warning: High risk of bricking the GPU if the wrong ROM is used.
##3. Fan Control
- Mod 1: Set a flat 40-50% fan curve in MSI Center so internal fans don't over-spin.
- Mod 3: Set internal fans to silent RPM (just enough for VRMs), control external radiator fans via an Aquacomputer OCTO.

#Part 5b: Linux Power Tuning
Part 5 assumes Windows. This is the same tuning on Ubuntu 24.04 with what actually works on this hardware, verified locally where marked. Every command needs root and has a revert line; nothing here persists across a reboot unless you add the systemd unit at the end.
##Tool Map
| Windows tool in Part 5 | Linux equivalent on this machine | Status |
|---|---|---|
| MSI Center (shift mode, fans, Cooler Boost) | /sys/devices/platform/msi-ec/* or the MControlCenter GUI, which since v0.5 drives msi-ec [L11] | Working, three fixed fan modes only |
| ThrottleStop (PL1/PL2) | RAPL powercap sysfs, setPL, or the throttled daemon [S8][S9] | Working; see the re-clamp note |
| ThrottleStop (undervolt) | intel-undervolt / undervolt after a BIOS unlock [L32] | Locked on this CPU, unverified after unlock |
| MSI Afterburner (GPU clocks) | nvidia-settings with Coolbits (already set to 28 in /etc/X11/xorg.conf.d/11-nvidia-coolbits.conf), or LACT [L15] | Clock offsets work on X11; no voltage control |
| MSI Afterburner (GPU power limit) | nvidia-smi -pl | Rejected on RTX 30 mobile since driver 535 [L18] |
| HWiNFO64 | sensors, turbostat (root), nvtop, s-tui, thermal_baseline.sh | Working; no GPU hotspot on Linux |
| Cinebench / 3DMark | stress-ng, glmark2, vkmark, Unigine, FurMark 2 for Linux | See Part 6b |
##1. Lift the CPU power limits (after Mod 4 only)
The kernel exposes PL1 as constraint_0 (long term, 30 W now), PL2 as constraint_1 (short term, 45 W, 2.4 ms window) and a peak limit constraint_2 (215 W). Writes take effect immediately and are lost on reboot.
R=/sys/class/powercap/intel-rapl:0
echo 45000000  | sudo tee $R/constraint_0_power_limit_uw    # PL1 45 W (Intel spec)
echo 90000000  | sudo tee $R/constraint_1_power_limit_uw    # PL2 90 W; the sister R6E chassis sustains 121 W with a healthy cooler [S1]
# revert: 30000000 and 45000000
Then watch whether it sticks. Two things can pull it back down:
- thermald. It is active here, with a custom
/etc/thermald/thermal-cpu-cdev-order.xml(backup dated 2026-09-05), and RAPL is one of its cooling devices, so it will re-clamp PL1 when its trip points fire [L36]. Either raise the trip inthermal-conf.xmlor, for testing only,sudo systemctl stop thermaldand compare. - The EC. No source documents the MSI EC re-asserting RAPL by itself; on Ubuntu that job is thermald's via DPTF. If the limit still drops with thermald stopped, the EC is doing it and the
throttleddaemon, which rewrites the limits on a timer, is the workaround [S8]. RAPL throttling does not show inpackage_throttle_count; watchPkgWattinturbostatinstead [L46].
Persist with a oneshot unit once the values are proven:
# /etc/systemd/system/rapl-limits.service
[Unit]
Description=Set RAPL PL1/PL2
After=multi-user.target thermald.service
[Service]
Type=oneshot
ExecStart=/bin/sh -c 'echo 45000000 > /sys/class/powercap/intel-rapl:0/constraint_0_power_limit_uw; echo 90000000 > /sys/class/powercap/intel-rapl:0/constraint_1_power_limit_uw'
[Install]
WantedBy=multi-user.target
sudo systemctl enable --now rapl-limits. Add a copy under /usr/lib/systemd/system-sleep/ if the limits reset after suspend. Do not install TLP and auto-cpufreq together; they fight over the same knobs [L38].
##2. Governor and EPP
intel_pstate is in active mode with HWP, so scaling_governor is really an EPP hint, not a clamp [L39]. For a repasted desktop-replacement:
sudo cpupower frequency-set -g performance
echo performance | sudo tee /sys/devices/system/cpu/cpu*/cpufreq/energy_performance_preference
# revert: -g powersave, balance_performance##3. GPU
- Power limit:
nvidia-smi -pl 140returns "not supported" on RTX 30 laptop GPUs on current drivers; the 140 W "max" the driver reports is Dynamic Boost headroom, not a user setting [L18]. Dynamic Boost needsnvidia-powerd, which is not installed here (systemctl status nvidia-powerdsays not found). Installing it is the only Linux route to the extra 25 W, and it is forum-grade evidence that it delivers. - Clocks:
nvidia-smi -lgcis also commonly ignored on laptops. What works is the Coolbits offset already configured on this box:
  nvidia-settings -a '[gpu:0]/GPUGraphicsClockOffsetAllPerformanceLevels=150'
  nvidia-settings -a '[gpu:0]/GPUMemoryTransferRateOffsetAllPerformanceLevels=1000'   # +500 MHz effective
  # revert: set both to 0
There is no voltage offset on Ampere under the Linux driver; "undervolting" a laptop GPU on Linux means a positive clock offset so the same clock lands at a lower voltage point on the curve, or nothing [L23].
- Hotspot:
nvidia-smi --query-gpu=temperature.gpu.tlimitis a valid key on driver 595.84 but returns N/A on this GPU (checked). Only the core temperature is available on Linux, so the Part 6 hotspot-delta check becomes the core-spread check in Part 6b. - VBIOS flashing:
nvflashfor Linux exists but the higher-TGP ROM advice in Part 5 is Windows-community lore with no Linux reports; unverified and unchanged in risk.
##4. Fan control per mod
msi-ec offers auto, silent and advanced; no curve. Mod 1 with a sealed blower: advanced gives the internal fans a fixed floor so the pad cannot over-spin them. Mod 3: silent. If you need a real curve, the unmaintained msi-fanctl project claims to write the EC curve table directly [L12]; single source, unverified, and it writes the same EC the two kernel drivers use, so test it with both unloaded.
##Unverified on this firmware
- The hidden BIOS menu and its OC Lock / CFG Lock / Undervolt Protection toggles on E1583IMS.112.
- Any undervolt tool on Alder Lake-H after that unlock.
- Whether the EC re-asserts PL1/PL2 independently of thermald.
- Write conflicts between msi-ec and msi_wmi_platform on this board.
- LACT's power-limit and offset features on a mobile GA104 with driver 595.84.
#Part 6: Testing & Validation
You must stress-test the new mounting pressure and thermal interface.
##The Validation Suite
- HWiNFO64: Run in "Sensors Only". Monitor
CPU Package Temp,GPU Temperature, andGPU Hotspot Temperature. - Cinebench R23 (CPU): Run a 10-minute loop. The 12900H should never hit 100°C with an extreme mod.
- 3DMark TimeSpy (GPU): The RTX 3070 Ti should maintain maximum boost clocks (~1700-1900MHz).
##What to watch out for:
- The "Hotspot Delta": Look at the difference between
GPU TemperatureandGPU Hotspot Temperaturein HWiNFO64. Normal is 10°C to 15°C. If your delta is >25°C, your heatsink is mounted unevenly. - VRM Throttling: If CPU/GPU temps are low but clock speeds abruptly drop under heavy load, your VRMs are overheating. Your K5 Pro application was too thin, or there isn't enough airflow over the motherboard.

#Part 6b: Linux Validation Suite
The Windows suite in Part 6 (HWiNFO64, Cinebench, 3DMark) does not exist on Ubuntu. This is the equivalent, built around the thermal_baseline.sh logger that ships next to this report. Every mod gets a labelled CSV before and after, so the decision matrix in this guide can be checked against your own numbers rather than someone else's.
Do not run the stress protocol on this machine until Mod 4 (or at least the Mod 0 dust clean) is done. The baseline already shows 96 °C at idle. A 10-minute all-core load in that state will hit the 100 °C trip point and the EC will hard-shut the laptop.
##Install
sudo apt install stress-ng s-tui lm-sensors linux-tools-common   # turbostat lives in linux-tools
# already present on this box: nvtop, glmark2, sensors, turbostat##The Logger: thermal_baseline.sh
Samples every N seconds into logs/thermal_<label>_<timestamp>.csv and prints nothing until you press Ctrl-C, when it prints a one-line summary. Columns: package °C, min/max core °C, core spread (the Linux stand-in for HWiNFO's hotspot delta), average CPU MHz, both fan RPMs, package watts, the kernel's package throttle counter, GPU °C / W / SM MHz / utilisation.
tools/thermal_baseline.sh 2 stock-idle          # 2 s interval, label "stock-idle"; Ctrl-C to stop
sudo tools/thermal_baseline.sh 2 after-mod4     # sudo unlocks RAPL package watts (energy_uj is root-only)
Sample output on this laptop, stock, seven seconds at the desktop:
samples=7 pkg avg=75.0C max=90C worst core spread=18C throttle delta=40 gpu max=44CA throttle delta of 40 in seven seconds at idle is the headline problem; after a good repaste it should be zero for the whole run.
##The Protocol
Run each stage with the logger in a second terminal, one label per stage. Keep the room temperature and the laptop position the same between before and after runs.
- Idle, 5 min. Nothing open but the terminal. Establishes the floor.
- CPU soak, 10 min. All 20 threads, a heavy floating-point kernel, so turbo and PL2 are fully exercised:
stress-ng --cpu 0 --cpu-method matrixprod --tz --metrics-brief --timeout 10m # --cpu 0 = one worker per thread; --tz prints thermal zonesJarrod'sTech's published method is three 10-minute passes averaged, so a single pass understates the steady state [S12].
- GPU soak, 10 min. OpenGL loop that pins the 3070 Ti at its power limit:
   glmark2 --run-forever --fullscreen      # light load; vkmark is the Vulkan twin
   # heavier and closer to 3DMark: Unigine Superposition, or FurMark 2's native Linux build
Watch clocks and power with nvtop or nvidia-smi dmon -s pucT alongside.
- Combined, 10 min. Stages 2 and 3 at once. This is the desktop-replacement worst case and the only stage that reveals shared-heatpipe problems.
- Live view while it runs:
sudo s-tui(temps, clocks, power, throttle flags in one screen) orsudo turbostat --show Package,Busy%,Bzy_MHz,PkgTmp,PkgWatt --interval 5.
##Pass Criteria
| Check | Pass | Why it matters |
|---|---|---|
| Package temp, sustained | < 95 °C at minute 10 of the CPU soak | Trip point is 100 °C; 95 leaves margin for summer. |
throttle_count delta | 0 across the whole run | Any increment means the CPU hit its thermal trip during the run. Power-limit throttling does not count here; catch it as PkgWatt pinned at PL1 in turbostat. |
| Core spread (max minus min core) | < 15 °C under load, < 10 °C ideal | Wider means uneven mount or a void in the thermal interface. This laptop started at 29 °C. Forum consensus puts a bad mount around 15 °C [S15][S16]; the Linux driver gives no GPU hotspot, so this is the only mount check available. |
| Package watts vs PL1 | Holds the configured PL1 (Part 5b) for the full 10 min | If watts fall below PL1 with temp under 95 °C, the EC or thermald is clamping, not the silicon. |
| CPU clock | Average MHz flat after minute 2, not sawtoothing | Sawtooth = repeated thermal or power throttle events. |
| GPU SM clock | ≥ 1700 MHz sustained at 115 W | Below that the GPU is power- or temperature-limited. |
| GPU temp | < 85 °C under the combined soak | NVIDIA mobile GPUs pull clocks back above roughly 85 °C. |
| Fans | Not stuck at maximum during the idle stage | Full-speed fans at idle mean the EC still sees a hot sensor. |
##Reading Failures
- Low temps but clocks drop under combined load only: VRM or VRAM heat. The putty in Mod 4 was too thin, or nothing is blowing across the board. Add a fan or re-pad.
- Package fine, one core 20 °C hotter: The heatsink is tilted. Redo the mount in a cross pattern, or add the washer mod from Mod 4.
- Watts capped below PL1 with cool temps: Software, not hardware. Check
thermald, the EC shift mode, and RAPL as described in Part 5b. - Temps climb slowly for 10 minutes and never plateau: Not enough heatsink mass or airflow for the sustained load. That is what Mods 1 to 3 solve; Mod 4 alone cannot.
#Sources
Citations in the text use the prefix of the research pass that found them: H hardware alternatives, L Linux tooling, S software-only path and validation. The full digests, with per-claim confidence ratings and the lists of claims that were dropped as unsupported, are in research/ next to this report.
##Hardware alternatives
- [H1] Amazon — IETS GT600 product listing: https://www.amazon.com/IETS-Equipped-Turbo-Fan%EF%BC%885-5inch-Diameter%EF%BC%89-14-1-19-3/dp/B0CDC3KBC1
- [H2] shantoreview.com — IETS GT600 RGB review: https://shantoreview.com/iets-gt600-rgb-laptop-cooling-pad-review/
- [H3] tensorscience.com — IETS GT600 hands-on notes: https://www.tensorscience.com/cooling/my-thoughts-on-using-the-iets-gt600-turbo-fan-laptop-cooling-pad-with-usb-hub
- [H4] techreviewz.blog — IETS GT500 review (2026): https://techreviewz.blog/iets-gt500-review/
- [H5] Amazon — Llano V12 (RGB) listing: https://www.amazon.com/llano-V12-Gaming-Laptop-Cooling/dp/B0C69BVWGB
- [H6] craftingworlds.com — Llano V12 Ultra review: https://craftingworlds.com/llano-v12-ultra-laptop-cooling-pad-review-a-laptop-cooler-that-actually-works/
- [H7] medium.com (Muteeb Hussain) — KLIM Ultimate review: https://medium.com/@muteeb.com/klim-ultimate-rgb-laptop-cooling-pad-with-led-rim-review-17c98b4b00f7
- [H8] Amazon — KLIM Ultimate listing: https://www.amazon.com/KLIM-Gaming-Compatible-17-inch-Laptops/dp/B07NNQXTQT
- [H9] Notebookcheck — "How well does a laptop cooling pad work?" (2020): https://www.notebookcheck.net/How-well-does-a-laptop-cooling-pad-work-We-Amazon-d-one-ourselves-to-find-out.464231.0.html
- [H10] Amazon — IETS GT202UB vacuum cooler listing: https://www.amazon.com/IETS-temperature-intelligent-measurement-2600-5000RPM/dp/B0991V82S3
- [H11] Tom's Guide forum — notebook exhaust vacuum fan thread: https://forums.tomsguide.com/threads/notebook-exhaust-vacuum-fan-any-thoughts.364354/latest
- [H12] Apex Tech — Honeywell PTM7950 product/spec page: https://apextech101.com/product/ptm-7950/
- [H13] Overclock.net — "PTM7950 or liquid metal on direct die?" thread: https://www.overclock.net/threads/ptm7950-or-liquid-metal-on-direct-die.1811663/
- [H14] Framework — PTM7958 thermal pad store page: https://frame.work/products/ptm7958-thermal-pad?v=FRAMCZ0001
- [H15] MODDIY — Honeywell PTM7958 SP paste, 1kg listing: https://www.moddiy.com/products/6702/Honeywell-PTM7958-SP-Super-Highly-Thermally-Conductive-PCM-Paste-1KG.html
- [H16] Igor'sLab — Thermal Grizzly KryoSheet lab/field test: https://www.igorslab.de/en/thermal-grizzly-cryosheet-in-lab-and-field-test-durable-all-purpose-weapon-with-minor-limitations/6/
- [H17] Tom's Hardware forum — KryoSheet graphene cooling pad discussion: https://forums.tomshardware.com/threads/thermal-grizzly-kryosheet-graphene-cooling-pad.3808893/
- [H18] Thermal Grizzly — official KryoSheet product page: https://www.thermal-grizzly.com/en/kryosheet/s-tg-ks-24-12
- [H19] Overclock.net — "PTM7950 vs Liquid metal vs Kryosheet" thread: https://www.overclock.net/threads/ptm7950-vs-liquid-metal-vs-kryosheet.1808499/
- [H20] Igor'sLab — 5-way phase-change pad roundup (PTM7950/7950SP/PCM5000/PCM8500/Heilos), Aug 2024: https://www.igorslab.de/en/5-phasenwechsel-pads-im-test-honeywell-ptm7950-ptm7950sp-vs-pcm5000-pcm8500-und-thermalright-heilos/
- [H21] Overclock.net — Thermalright Heilos thread: https://www.overclock.net/threads/thermalright-heilos-thermal-pads.1807207/
- [H22] e-catalog.com — Conductonaut Extreme vs Conductonaut spec comparison: https://e-catalog.com/cmp/142454/conductonaut-extreme-1g-vs-conductonaut-1g/
- [H23] LinusTechTips forum — "Thermal Grizzly PTM vs Conductonaut Extreme" thread: https://linustechtips.com/topic/1586126-thermal-grizzly-ptm-vs-conductonaut-extreme-liquid-metal/
- [H24] Overclock.net — "Beware of misleading information ... regarding Thermal Putty" thread: https://www.overclock.net/threads/beware-of-misleading-information-from-computer-systems-gr-regarding-thermal-putty.1809275/
- [H25] Overclock.net — Thermal Putty vs Thermal Pads comparison thread: https://www.overclock.net/threads/thermal-putty-vs-thermal-pads-comparison-chart.1810430/
- [H26] Computer Systems (Greece) — Upsiren U6 Pro product page: https://computer-systems.gr/products/upsiren-u6-pro-10g/
- [H27] LaptopMedia — "Inside MSI Crosshair 15 (B12Ux)" disassembly article (fetch blocked by site, cited via search snippet — re-verify manually): https://laptopmedia.com/highlights/inside-msi-crosshair-15-b12ux-disassembly-and-upgrade-options/
- [H28] Amazon — replacement dual fan assembly for Crosshair 15 B12U/B12UX/B12UGSZ/B12UGZ/B12UEZ: https://www.amazon.com/SYW%C2%B7pcparts-Dual-Cooling-Fans-Crosshair/dp/B0FWYQNDS7
- [H29] eBay — Crosshair 15 R6E B12UEZ/B12UGZ fan+heatsink part listing: https://www.ebay.com/itm/256862163018
- [H30] Amazon — heatsink part E32-2500871-HH7, listed compatible across Katana GF66/Pulse GL66/WF66/Creator M16/Crosshair 15: https://www.amazon.com/Heatsink-E32-2500871-HH7-Compatible-Replacement-Crosshair/dp/B0DNNK9V9X
- [H31] eBay (DE) — Pulse GL66/GL76, Katana GF66/GF76 heatsink+fan part listing: https://www.ebay.de/itm/116496256442
- [H32] nanoreview.net — MSI GE66 Raider vs Crosshair 15 comparison: https://nanoreview.net/en/laptop-compare/msi-ge66-raider-vs-msi-crosshair-15
- [H33] MSI Global Forum — "2nd M.2 screw hole not available and DC-in connector has a lot of play," Crosshair 15 C12VE, Sept 2023: https://forum-en.msi.com/index.php?threads/2nd-m-2-screw-hole-not-available-and-dc-in-connector-has-a-lot-of-play-msi-crosshair-15-c12ve.389373/
- [H34] MSI — MS-15P2 (Crosshair/GL) official service guide PDF: https://storage-asset.msi.com/global/pdf/ServiceGuide_15P2_Crosshair+(GL)_v1.0_English_0614.pdf
- [H35] Overclock.net — "Extra or thicker washers to increase heatsink GPU pressure" thread: https://www.overclock.net/threads/extra-or-thicker-washers-to-increase-heatsink-gpu-pressure.1775188/
- [H36] Tom's Hardware forum — "Increasing mounting pressure of a laptop's heatsink" thread: https://forums.tomshardware.com/threads/increasing-mounting-pressure-of-a-laptops-heatsink-what-do-you-think.2662481/
- [H37] Wikipedia — CPU shim: https://en.wikipedia.org/wiki/CPU_shim
- [H38] Tom's Guide forum — "General Copper Mod (Shim) Question": https://forums.tomsguide.com/threads/general-copper-mod-shim-question.276618/latest
- [H39] Tom's Hardware forum — "DIY Heatsink with copper tube for Laptop cooling?" thread: https://forums.tomshardware.com/threads/diy-heatsink-with-copper-tube-for-laptop-cooling.2619529/
- [H40] Overclockers UK forum — "DIY sub-ambient water chiller with dew point control" build log: https://forums.overclockers.co.uk/threads/i-built-a-diy-sub-ambient-water-chiller-with-dew-point-control.19011177/
- [H41] Overclock.net — "Sub Ambient condensation prevention" thread: https://www.overclock.net/threads/advice-sub-ambient-condesnation-prevention.1583708/
- [H42] Google Patents — US6205796B1, "Sub-dew point cooling of electronic systems": https://patents.google.com/patent/US6205796B1
- [H43] YouTube — "I Bolted a Desktop CPU Cooler to a GTX 1060 Laptop": https://www.youtube.com/watch?v=slLSCf4WP7g
- [H44] Overclockers.com — "Laptop Cooler Mod" article: https://www.overclockers.com/laptop-cooler-mod/
- [H45] Overclock.net — "Laptop cooling with peltier" thread: https://www.overclock.net/threads/laptop-cooling-with-peltier.1401395/
- [H46] Overclock.net — "Condensation on peltier" thread: https://www.overclock.net/threads/condensation-on-peltier.506120/
- [H47] PCWorld — Cooler Master thermoelectric closed-loop desktop CPU cooler coverage (2018, dated): https://www.pcworld.com/article/402079/cooler-master-thermoelectric-cooler.html
##Linux tooling
- [L1] https://github.com/BeardOverflow/msi-ec (repo)
- [L2] https://raw.githubusercontent.com/BeardOverflow/msi-ec/main/msi-ec.c (source, fetched directly and grepped for
1583EMS1) - [L3] https://github.com/BeardOverflow/msi-ec/blob/main/README.md
- [L4] https://github.com/BeardOverflow/msi-ec/issues/398
- [L5] https://github.com/BeardOverflow/msi-ec/issues/108
- [L6] https://github.com/BeardOverflow/msi-ec/discussions/277
- [L7] https://docs.kernel.org/7.0/wmi/devices/msi-wmi-platform.html
- [L8] https://lkml.org/lkml/2025/5/19/69 (Armin Wolf, msi-wmi-platform fan-curve/platform-profile/tdp/battery patch series)
- [L9] https://lkml.iu.edu/2511.1/01820.html (msi-wmi-platform DMI/GUID matching discussion)
- [L10] https://www.phoronix.com/news/MSI-WMI-Platform-Driver-Linux
- [L11] https://github.com/dmitry-s93/MControlCenter
- [L12] https://github.com/YaxOFF/msi-fanctl
- [L13] https://www.igorslab.de/en/lact-0-10-0-nvidia-tuning-linux-voltage-boost-gddr7-temperatures/
- [L14] https://www.gamingonlinux.com/2026/08/linux-gpu-configuration-and-monitoring-tool-lact-adds-more-nvidia-gpu-overclocking-options/
- [L15] https://github.com/ilya-zlobintsev/LACT/issues/1114
- [L16] https://gitlab.com/leinardi/gwe/-/merge_requests/80
- [L17] https://gitlab.com/leinardi/gwe/-/issues/125
- [L18] https://forums.developer.nvidia.com/t/rtx-3080-mobile-power-limit-shows-n-a-but-worked-before/254925
- [L19] https://forums.developer.nvidia.com/t/changing-power-management-limit-is-not-supported-for-gpu-pascal-gtx1060-laptop-mobile-linux-555-nvidia-smi-powerlimit/298873
- [L20] https://forums.developer.nvidia.com/t/power-limit-on-3000-mobile-series/193443
- [L21] https://bbs.archlinux.org/viewtopic.php?id=302133
- [L22] https://forums.developer.nvidia.com/t/how-to-force-lock-sm-and-memory-clocks-on-rtx-5090-headless-linux/348794
- [L23] https://forums.developer.nvidia.com/t/nvidia-rt3070-eth-oc-in-ubuntu20-04-nvidia-settings-a-gpugraphicsclockoffset-gpumemorytransferrateoffset-not-working/178687
- [L24] https://forums.developer.nvidia.com/t/option-coolbits-is-not-used-optimus-enabled-laptop-running-an-rtx-2070-manjaro-linux/111771
- [L25] https://github.com/NVIDIA/open-gpu-kernel-modules/discussions/236
- [L26] https://download.nvidia.com/XFree86/Linux-x86_64/450.57/README/primerenderoffload.html
- [L27] https://wiki.archlinux.org/title/PRIME
- [L28] https://bbs.archlinux.org/viewtopic.php?id=250844
- [L29] https://forums.tomshardware.com/threads/voltage-control-suddenly-disabled-on-msi-laptop.3822367/
- [L30] https://forums.linuxmint.com/viewtopic.php?t=456082
- [L31] https://www.notebookcheck.net/XMG-reintroduces-BIOS-based-undervolting-on-laptops-with-Intel-Raptor-Lake-CPUs.708045.0.html
- [L32] https://github.com/georgewhewell/undervolt
- [L33] https://code-dev.fixnum.org/2024-11-16-intel-cpu-undervolt-unlock/
- [L34] https://github.com/wesmar/UnderVolter
- [L35] https://man.archlinux.org/man/extra/thermald/thermal-conf.xml.5.en
- [L36] https://github.com/intel/thermal_daemon
- [L37] https://bugs.launchpad.net/ubuntu/+source/thermald/+bug/1940485
- [L38] https://linrunner.de/tlp/settings/processor.html
- [L39] https://wiki.archlinux.org/title/CPU_frequency_scaling
- [L40] https://github.com/AdnanHodzic/auto-cpufreq/issues/9
- [L41] https://manpages.debian.org/testing/stress-ng/stress-ng.1.en.html
- [L42] https://wiki.ubuntu.com/Kernel/Reference/stress-ng
- [L43] https://www.pcsuggest.com/gpu-benchmarking-and-stress-testing-in-linux/
- [L44] https://ubuntuhandbook.org/index.php/2024/11/benchmark-stress-test-gpu/
- [L45] https://linuxvox.com/blog/gpu-stress-test-linux/
- [L46] https://docs.kernel.org/admin-guide/thermal/intel_thermal_throttle.html
##Software-only path and validation
- [S1] Notebookcheck — MSI Crosshair 15 R6E review (i7-12700H + RTX 3070): https://www.notebookcheck.net/MSI-Crosshair-15-R6E-in-review-Core-i7-12700H-and-RTX-3070-combo-augurs-well-for-QHD-gaming.675959.0.html
- [S2] Notebookcheck (DE) — same review: https://www.notebookcheck.com/MSI-Crosshair-15-R6E-im-Test-Vielversprechender-QHD-Gamer-mit-Core-i7-12700H-und-RTX-3070.676534.0.html
- [S3] Notebookcheck — "Intel and OEMs have killed undervolting...": https://www.notebookcheck.net/Intel-and-OEMs-have-killed-undervolting-and-there-is-little-that-you-can-do-about-it.477330.0.html
- [S4] Notebookcheck — throttling-in-reviews opinion piece: https://www.notebookcheck.net/Opinion-It-s-time-we-talked-about-throttling-in-reviews.234232.0.html
- [S5] Notebookcheck — Core Ultra 7 155H throttling behavior (methodology context): https://www.notebookcheck.net/Core-Ultra-7-155H-exhibiting-throttling-behavior-by-up-to-25-percent-on-smaller-laptop-models.977246.0.html
- [S6] Notebookcheck — ThrottleStop guide (PROCHOT/throttling explainer): https://www.notebookcheck.net/How-to-Lower-Temperatures-Stop-Throttling-and-Increase-Battery-Life-The-ThrottleStop-Guide-2017.213140.0.html
- [S7] TechSpot — Intel Core i9-12900HK review (75W parity with 12700H): https://www.techspot.com/review/2425-intel-core-i9-12900hk/
- [S8] GitHub — erpalma/throttled (Linux EC power-limit reset daemon): https://github.com/erpalma/throttled
- [S9] GitHub — horshack-dpreview/setPL (Linux PL1/PL2 setter): https://github.com/horshack-dpreview/setPL
- [S10] AnandTech Forums — setPL utility thread: https://forums.anandtech.com/threads/fyi-my-utility-for-setting-the-pl1-pl2-power-levels-under-linux-setpl.2606729/
- [S11] kernel-internals.org — Power Capping and RAPL: https://kernel-internals.org/power/power-capping/
- [S12] Jarrod's Tech — Laptop CPU Performance in Cinebench 2024 (methodology): https://jarrods.tech/laptop-cpu-performance-in-cinebench-2024/
- [S13] Jarrod's Tech — site/methodology overview: https://jarrods.tech/
- [S14] Tom's Hardware Forum — "How to stop i7 12700H from Power limit throttling?": https://forums.tomshardware.com/threads/how-to-stop-i7-12700h-from-power-limit-throttling.3769453/
- [S15] Tom's Hardware Forum — "Uneven cpu core temps after repasting": https://forums.tomshardware.com/threads/uneven-cpu-core-temps-after-repasting.3752580/
- [S16] Intel Community — "Temperature difference between cores": https://community.intel.com/t5/Mobile-and-Desktop-Processors/Temperature-difference-between-cores/td-p/202375
- [S17] AMD Community — "Are uneven CPU core temps due to bad thermal paste application?": https://community.amd.com/t5/pc-processors/are-uneven-cpu-core-temps-due-to-bad-thermal-paste-application/m-p/595043
- [S18] ROG Forum — BD PROCHOT Red/Yellow in ThrottleStop: https://rog-forum.asus.com/t5/overclocking-tweaking/bd-prochot-red-yellow-in-throttlestop-g731gw-solved/td-p/866355
- [S19] Acer Community — BD PROCHOT causing throttling on Helios 300 i7-8750H: https://community.acer.com/en/discussion/544991/bd-prochot-causes-cpu-throttling-to-803-mhz-helios-300-i7-8750h
- [S20] Tom's Hardware Forum — "What does the PROCHOT 95°C do?": https://forums.tomshardware.com/threads/what-does-the-prochot-95%C2%B0c-do.3301894/
- [S21] Ultrabookreview — The ThrottleStop Guide (2026): https://www.ultrabookreview.com/31385-the-throttlestop-guide/
- [S22] KitGuru — MSI Crosshair 15 R6E review (ports/specs, no Thunderbolt): https://www.kitguru.net/lifestyle/mobile/laptops/luke-hill/msi-crosshair-15-r6e-laptop-review-core-i7-12700h-rtx-3070/
- [S23] Best Buy Q&A — Crosshair 15 R6E port configuration: https://www.bestbuy.com/site/questions/msi-crosshair-15-rainbow-six-extraction-edition-b12u-15-6-gaming-laptop-intel-core-i7-16-gb-memory-nvidia-geforce-rtx-3070-multicolor-gradient/6501181
- [S24] Best Buy Q&A — Crosshair 16 Thunderbolt 4 confirmation (contrast case): https://www.bestbuy.com/site/questions/msi-crosshair-16-144hz-gaming-laptop-intel-13th-gen-core-i7-with-16gb-memory-nvidia-geforce-rtx-4070-1tb-ssd-black/6537000/question/e63c4191-9235-335c-a0ca-30b795a4039d
- [S25] PC Gamer — "Thunderbolt vs OCuLink external GPU interface-off": https://www.pcgamer.com/hardware/graphics-cards/state-of-play-egpus/
- [S26] egpu.io forums — "Buying a Laptop for eGPU?": https://egpu.io/forums/which-gear-should-i-buy/buying-a-laptop-for-egpu/
- [S27] HomeGuide — Geek Squad Prices 2026 (general labor rates, no repaste line item): https://homeguide.com/costs/geek-squad-prices
- [S28] phonerepairmore.com — Geek Squad Prices 2026: https://phonerepairmore.com/best-buy-geek-squad-repair-guide/
- [S29] Overclock.net — "Best way I've found to massively lower in-game CPU temps without impacting FPS": https://www.overclock.net/threads/best-way-ive-found-to-massively-lower-in-game-cpu-temps-without-impacting-fps.1800234/
- [S30] LinusTechTips forum — "GPU hotspot temp in excess of 100 degrees - 3070 ti": https://linustechtips.com/topic/1432702-gpu-hotspot-temp-in-excess-of-100-degrees-3070-ti/
- [S31] Tom's Hardware Forum — Gigabyte RTX 3070 hotspot temperature (delta heuristics): https://forums.tomshardware.com/threads/gigabyte-rtx-3070-hotspot-temperature.3756380/
- [S32] mundobytes.com — MSI Center performance/power profile explainer (mode-naming, no wattage table): https://mundobytes.com/en/MSI-Center-and-Windows/
- [S33] MSI — Crosshair 15 12U product page (spec reference): https://www.msi.com/Laptop/Crosshair-15-B12UX